首先在Follow添加订阅源 :https://xmaihh.github.io/blog/atom.xml
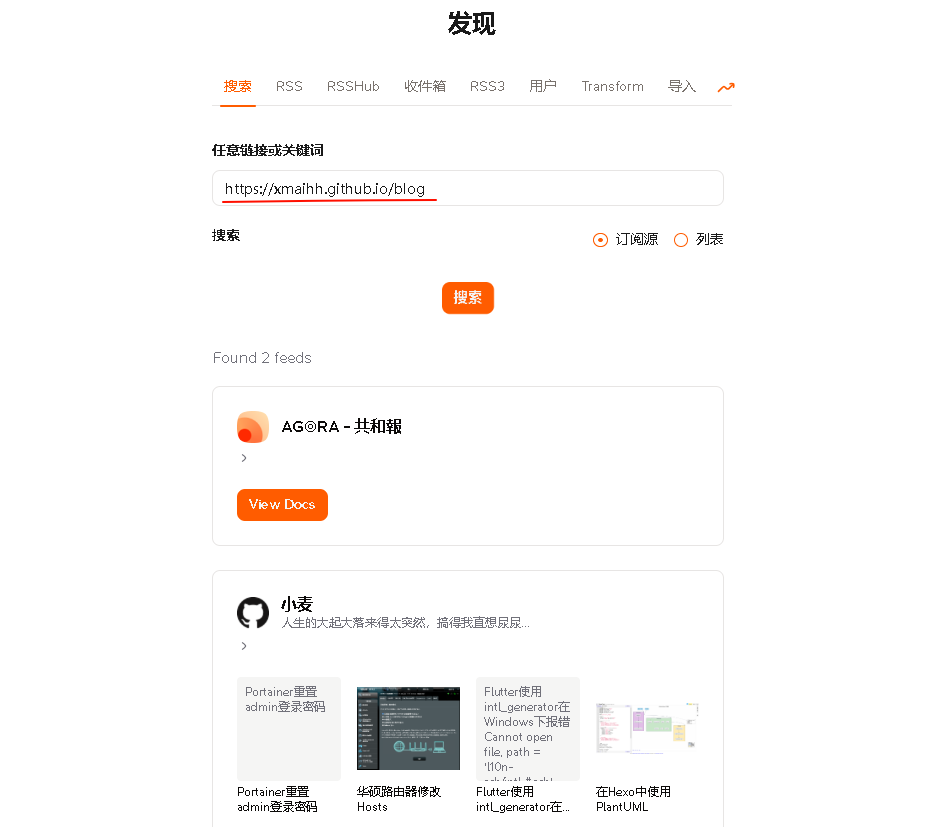
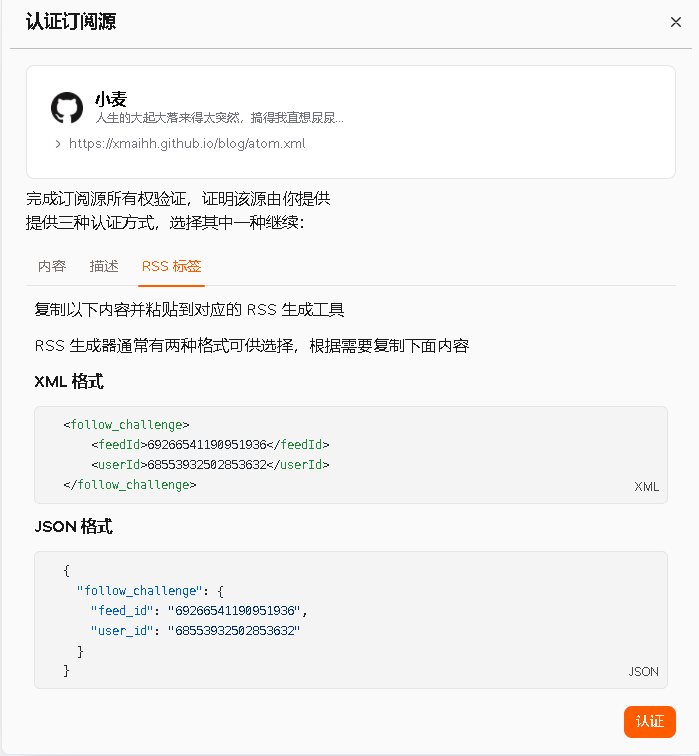
添加订阅源之后,在Follow上获得需要认证的代码
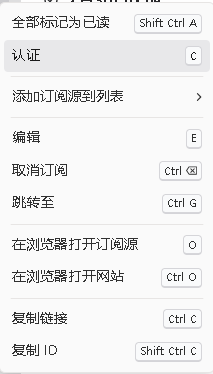
我使用hexo-generator-feed插件来生成 RSS订阅源,详细配置选项请参考官方文档
修改根目录下的_config.yml:
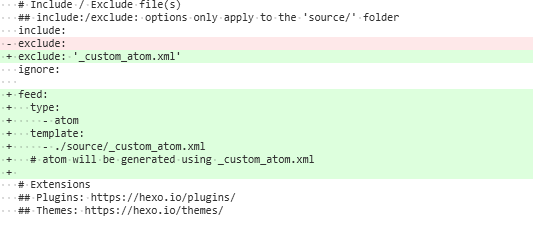
原理是:修改自定义模板,使用该模板文件将用于生成 feed xml 文件。
所以将Follow认证的代码插入:
1
2
3
4
| <follow_challenge>
<feedId>69266541190951936</feedId>
<userId>68553932502853632</userId>
</follow_challenge>
|
_custom_atom.xml完整内容如下:
1
2
3
4
5
6
7
8
9
10
11
12
13
14
15
16
17
18
19
20
21
22
23
24
25
26
27
28
29
30
31
32
33
34
35
36
37
38
39
40
41
42
43
44
45
46
47
48
49
50
51
52
53
54
55
56
57
58
59
60
61
62
| <?xml version="1.0" encoding="utf-8"?>
<feed xmlns="http://www.w3.org/2005/Atom">
<follow_challenge>
  <feedId>69266541190951936</feedId>
  <userId>68553932502853632</userId>
</follow_challenge>
<title>{{ config.title }}</title>
{% if icon %}<icon>{{ icon }}</icon>{% endif %}
{% if config.subtitle %}<subtitle>{{ config.subtitle }}</subtitle>{% endif %}
<link href="{{ feed_url | uriencode }}" rel="self"/>
{% if config.feed.hub %}<link href="{{ config.feed.hub | uriencode }}" rel="hub"/>{% endif %}
<link href="{{ url | uriencode }}"/>
<updated>{% if posts.first().updated %}{{ posts.first().updated.toISOString() }}{% else %}{{ posts.first().date.toISOString() }}{% endif %}</updated>
<id>{{ url | uriencode }}</id>
{% if config.author %}
<author>
<name>{{ config.author }}</name>
{% if config.email %}<email>{{ config.email }}</email>{% endif %}
</author>
{% endif %}
<generator uri="https://hexo.io/">Hexo</generator>
{% for post in posts.toArray() %}
<entry>
<title>{{ post.title }}</title>
<link href="{{ post.permalink | uriencode }}"/>
<id>{{ post.permalink | uriencode }}</id>
<published>{{ post.date.toISOString() }}</published>
<updated>{% if post.updated %}{{ post.updated.toISOString() }}{% else %}{{ post.date.toISOString() }}{% endif %}</updated>
{% if config.feed.content and post.content %}
<content type="html"><![CDATA[{{ post.content | noControlChars | safe }}]]></content>
{% endif %}
{% if post.description %}
<summary type="html">{{ post.description }}</summary>
{% elif post.intro %}
<summary type="html">{{ post.intro }}</summary>
{% elif post.excerpt %}
<summary type="html">{{ post.excerpt }}</summary>
{% elif post.content %}
{% set short_content = post.content.substring(0, config.feed.content_limit) %}
{% if config.feed.content_limit_delim %}
{% set delim_pos = short_content.lastIndexOf(config.feed.content_limit_delim) %}
{% if delim_pos > -1 %}
<summary type="html">{{ short_content.substring(0, delim_pos) }}</summary>
{% else %}
<summary type="html">{{ short_content }}</summary>
{% endif %}
{% else %}
<summary type="html">{{ short_content }}</summary>
{% endif %}
{% endif %}
{% if post.image %}
<content src="{{ post.image | formatUrl }}" type="image"/>
{% endif %}
{% for category in post.categories.toArray() %}
<category term="{{ category.name }}" scheme="{{ category.permalink }}"/>
{% endfor %}
{% for tag in post.tags.toArray() %}
<category term="{{ tag.name }}" scheme="{{ tag.permalink }}"/>
{% endfor %}
</entry>
{% endfor %}
</feed>
|
完成后,本地运行看看效果。
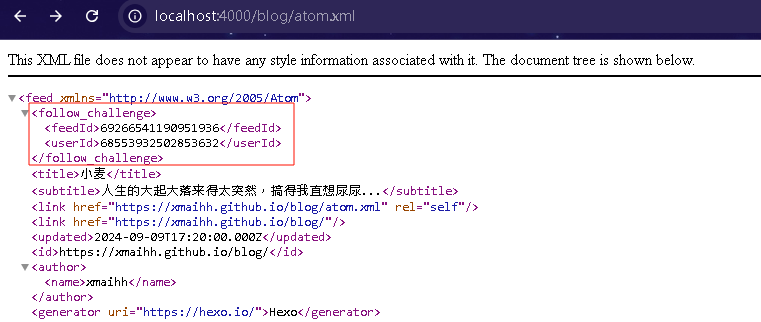
确认添加上Follow的认证代码后,hexo d部署完成后回到Follow点击认证即可。
Reference
三分钟,让Follow认证我的Hexo博客订阅源


