在Android原生开发中,页面跳转用Intent类实现

1
2
Intent intent =new Intent(MainActivity.this,SecondActivity.class);
startActivity(intent);

而在安卓原生开发中,页面传值有多种方法,常见的可以用intent、Bundle、自定义类、静态变量等等来传值。
Flutter提供了两种方法路由,分别是 Navigator.push() 以及 Navigator.pushNamed()

此文基于 Flutter版本 Channel stable,v1.9.1+hotfix.2

页面跳转

构建路由Navigator.push()

  1. Navigator.push()
    从第一个页面(FirstPage())跳转到第二个页面(SecondPage())
    1
    2
    3
    4
    5
    6
    7
    // Within the `FirstPage` widget
    onPressed: () {
    Navigator.push(
    context,
    MaterialPageRoute(builder: (context) => SecondPage()),
    );
    }
  2. 使用Navigator.pop()回到第一个页面(FirstPage())
    1
    2
    3
    4
    // Within the SecondPage widget
    onPressed: () {
    Navigator.pop(context);
    }

命名路由Navigator.pushNamed()

  1. Navigator.pushNamed()
    首先需要定义一个routes
    1
    2
    3
    4
    5
    6
    7
    8
    9
    10
    11
    12
    13
    MaterialApp(
    // home: FirstPage(),

    // Start the app with the "/" named route. In this case, the app starts
    // on the FirstPage widget.
    initialRoute: '/',
    routes: {
    // When navigating to the "/" route, build the FirstPage widget.
    '/': (context) => FirstPage(),
    // When navigating to the "/second" route, build the SecondPage widget.
    '/second': (context) => SecondPage(),
    },
    );

注意这里定义了initialRoute之后,就不能定义home属性。应该把之前定义的home属性注释掉。
initialRoute属性不能与home共存,只能选一个。

  1. 从第一个页面(FirstPage())跳转到第二个页面(SecondPage())
1
2
3
4
5
// Within the `FirstPage` widget
onPressed: () {
// Navigate to the second page using a named route.
Navigator.pushNamed(context, '/second');
}

使用Navigator.pop()回到第一个页面(FirstPage())

1
2
3
4
// Within the SecondPage widget
onPressed: () {
Navigator.pop(context);
}

传值跳转

构建路由Navigator.push()

  1. 首先定义需要传的值
1
2
3
4
5
6
7
8
9
// You can pass any object to the arguments parameter.
// In this example, create a class that contains a customizable
// title and message.
class ScreenArguments {
final String title;
final String message;

ScreenArguments(this.title, this.message);
}
  1. 第二个页面(SecondPage())接受传值
1
2
3
4
5
6
7
8
9
10
11
12
13
14
15
16
17
18
19
// A widget that extracts the necessary arguments from the ModalRoute.
class SecondPage extends StatelessWidget {

@override
Widget build(BuildContext context) {
// Extract the arguments from the current ModalRoute settings and cast
// them as ScreenArguments.
final ScreenArguments args = ModalRoute.of(context).settings.arguments;

return Scaffold(
appBar: AppBar(
title: Text(args.title),
),
body: Center(
child: Text(args.message),
),
);
}
}
  1. 从第一个页面(FirstPage())传值
    1
    2
    3
    4
    5
    6
    7
    8
    9
    10
    11
    12
    13
    14
    15
    16
    17
    18
    19
    onPressed: () {
    // When the user taps the button, navigate to the specific route
    // and provide the arguments as part of the RouteSettings.
    Navigator.push(
    context,
    MaterialPageRoute(
    builder: (context) => SecondPage(),
    // Pass the arguments as part of the RouteSettings. The
    // ExtractArgumentScreen reads the arguments from these
    // settings.
    settings: RouteSettings(
    arguments: ScreenArguments(
    'Extract Arguments Screen',
    'This message is extracted in the build method.',
    ),
    ),
    ),
    );
    }

命名路由Navigator.pushNamed()

  1. 首先定义需要传的值
1
2
3
4
5
6
7
8
9
// You can pass any object to the arguments parameter.
// In this example, create a class that contains a customizable
// title and message.
class ScreenArguments {
final String title;
final String message;

ScreenArguments(this.title, this.message);
}
  1. 其次定义一下routes

    1
    2
    3
    4
    5
    6
    7
    8
    9
    10
    11
    12
    13
    14
    15
    16
    17
    18
    19
    20
    21
    22
    23
    24
      MaterialApp(
    // Provide a function to handle named routes. Use this function to
    // identify the named route being pushed, and create the correct
    // Screen.
    onGenerateRoute:
    (settings) {
    // If you push the PassArguments route
    if (settings.name == "/passArguments") {
    // Cast the arguments to the correct type: ScreenArguments.
    final ScreenArguments args = settings.arguments;

    // Then, extract the required data from the arguments and
    // pass the data to the correct screen.
    return MaterialPageRoute(
    builder: (context) {
    return SecondPage(
    title: args.title,
    message: args.message,
    );
    },
    );
    }
    },
    );
  2. 第二个页面(SecondPage())接受传值

    1
    2
    3
    4
    5
    6
    7
    8
    9
    10
    11
    12
    13
    14
    15
    16
    17
    18
    19
    20
    21
    22
    23
    24
    25
    26
    27
    28
    // A Widget that accepts the necessary arguments via the constructor.
    class SecondPage extends StatelessWidget {
    final String title;
    final String message;

    // This Widget accepts the arguments as constructor parameters. It does not
    // extract the arguments from the ModalRoute.
    //
    // The arguments are extracted by the onGenerateRoute function provided to the
    // MaterialApp widget.
    const SecondPage({
    Key key,
    @required this.title,
    @required this.message,
    }) : super(key: key);

    @override
    Widget build(BuildContext context) {
    return Scaffold(
    appBar: AppBar(
    title: Text(title),
    ),
    body: Center(
    child: Text(message),
    ),
    );
    }
    }
  3. 从第一个页面(FirstPage())传值

    1
    2
    3
    4
    5
    6
    7
    8
    9
    10
    11
    12
    onPressed: () {
    // When the user taps the button, navigate to a named route
    // and provide the arguments as an optional parameter.
    Navigator.pushNamed(
    context,
    "/passArguments",
    arguments: ScreenArguments(
    'Accept Arguments Screen',
    'This message is extracted in the onGenerateRoute function.',
    ),
    );
    }

第三方插件

Fluro是Flutter路由库

添加方式

1
2
dependencies:
fluro: "^1.5.1"

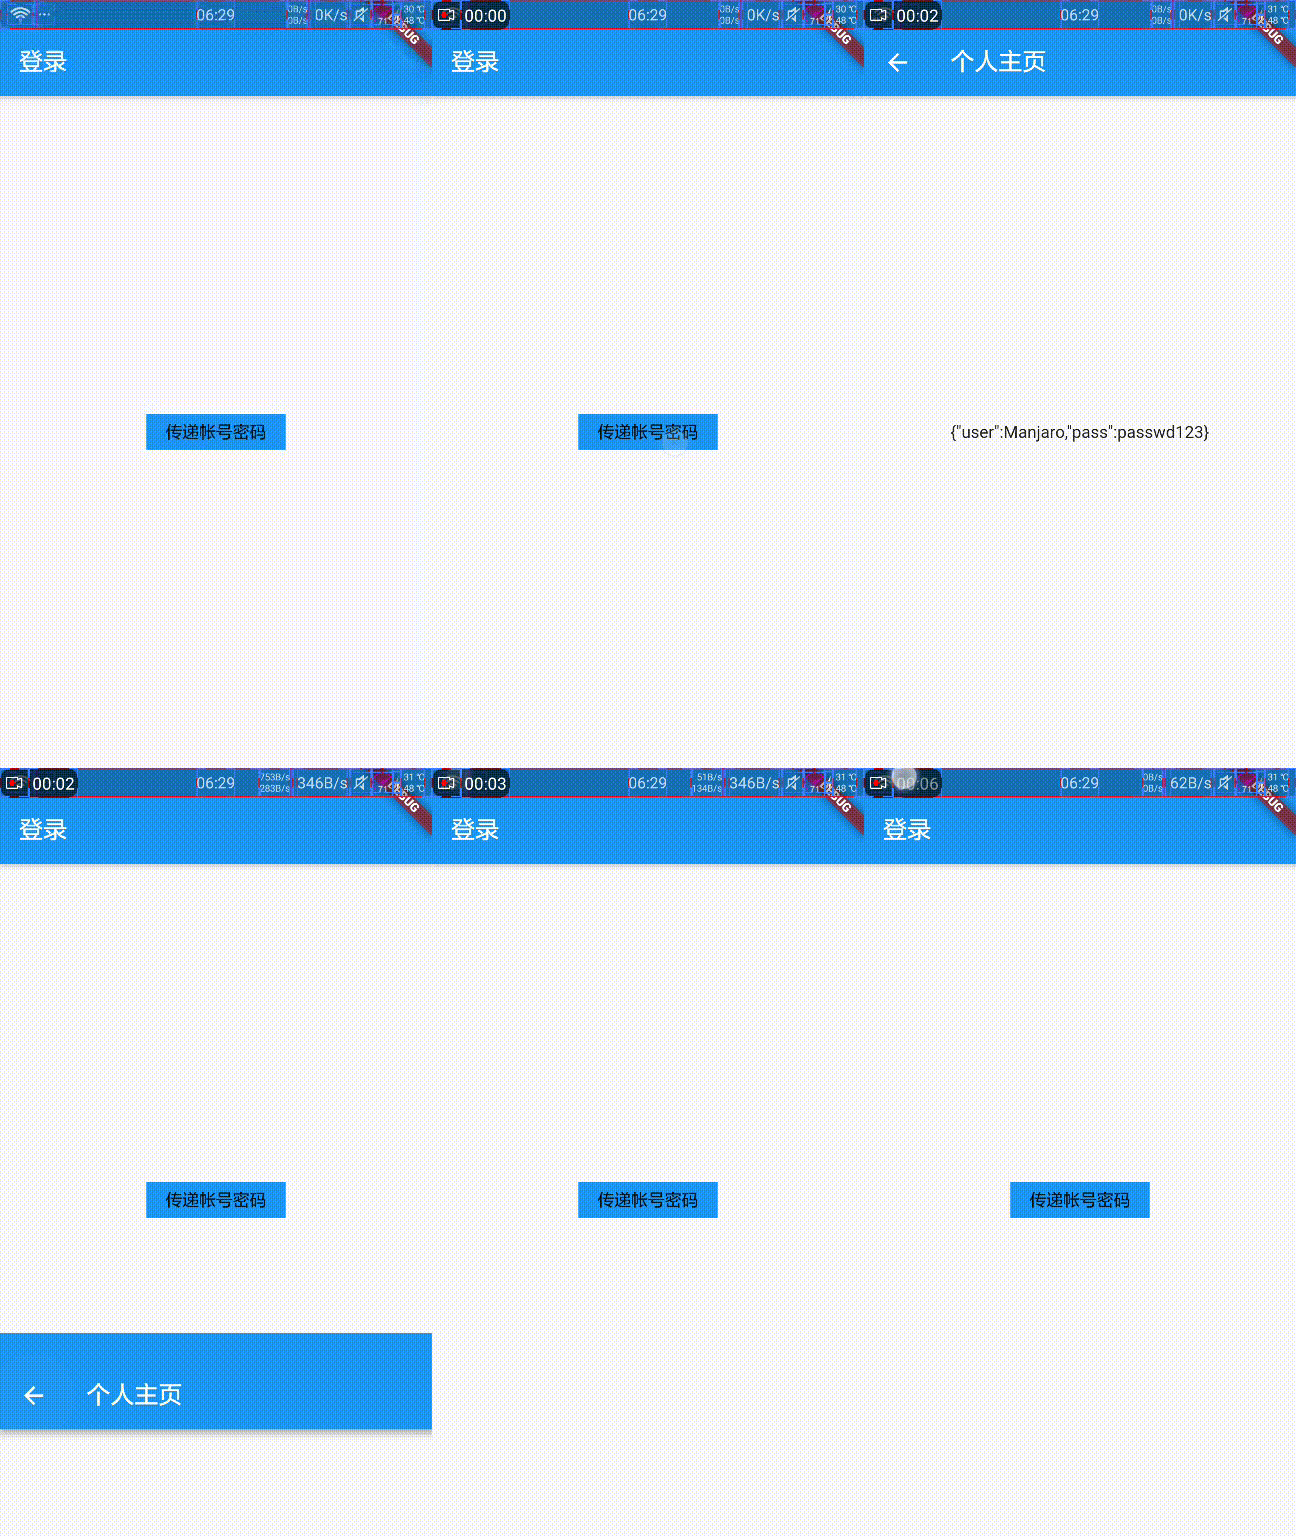
使用例子

1
2
3
4
5
6
7
8
9
10
11
12
13
14
15
16
17
18
19
20
21
22
23
24
25
26
27
28
29
30
31
32
33
34
35
36
37
38
39
40
41
42
43
44
45
46
47
48
49
50
51
52
53
54
55
56
57
58
59
60
61
62
63
64
65
66
import 'package:flutter/material.dart';
import 'app_route.dart';
import 'package:fluro/fluro.dart';

void main() {
router.define('home/:data', handler: new Handler(
handlerFunc: (BuildContext context, Map<String, dynamic> params) {
return new Home(params['data'][0]);
}));
runApp(new Login());
}

class Login extends StatefulWidget{
@override
createState() => new LoginState();
}

class LoginState extends State<Login>{
@override
Widget build(BuildContext context) {
return new MaterialApp(
title: 'Fluro 例子',

home: new Scaffold(
appBar: new AppBar(
title: new Text("登录"),
),
body: new Builder(builder: (BuildContext context) {
return new Center(child:
new Container(
height: 30.0,
color: Colors.blue,
child:new FlatButton(
child: const Text('传递帐号密码'),
onPressed: () {
var bodyJson = '{"user":Manjaro,"pass":passwd123}';
router.navigateTo(context, '/home/$bodyJson');
},
)),
);
}),
));
}
}


class Home extends StatefulWidget{
final String _result;
Home(this._result);
@override
createState() => new HomeState();
}

class HomeState extends State<Home>{
@override
Widget build(BuildContext context) {
return new Center(
child: new Scaffold(
appBar: new AppBar(
title: new Text("个人主页"),
),
body:new Center(child: new Text(widget._result)),
)
);
}
}

‘app_route.dart’的代码:

1
2
import 'package:fluro/fluro.dart';
Router router = new Router();

Reference

fluro
官方文档
flutter移动开发中的页面跳转和传值